Introduction
I’ve been quiet for the past months, mostly because of summer, but also because I’ve been busy getting (re)aquatinted with circuit design. I haven’t played around with electronics in 20 years, but when I recently got my hands on an Arduino “starter kit” I just had to try it out.
My go-to platform for solving home automation has been the Raspbery Pi, but RPi’s have a tendency to fail. There’s the good old SD Card failing, and recently I’ve had a lot of USB resets. Also, Arduinis are much cheaper.
Projects
I’ve been busy designing a few things, most of which I’ll make detailed posts on later.
- Animated Halloween pumpkin.
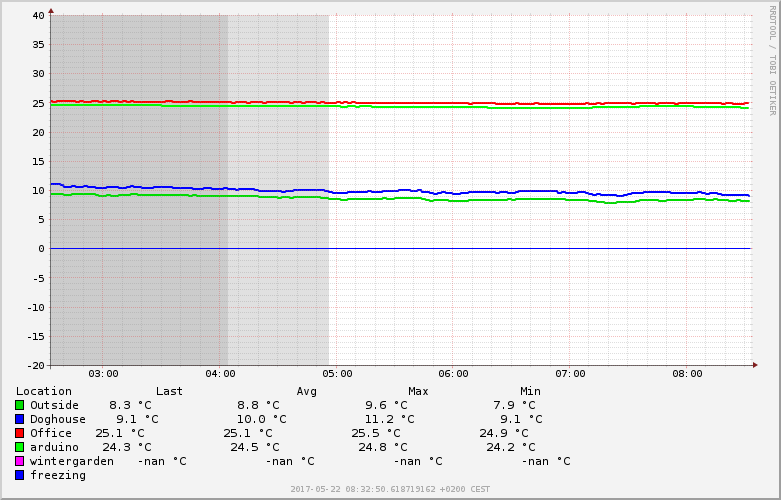
- Surveillance client v2
- Fish tank lighting
- Smoke detector w 230v relay
The focus of this post will be the surveillance client v2.
Tools
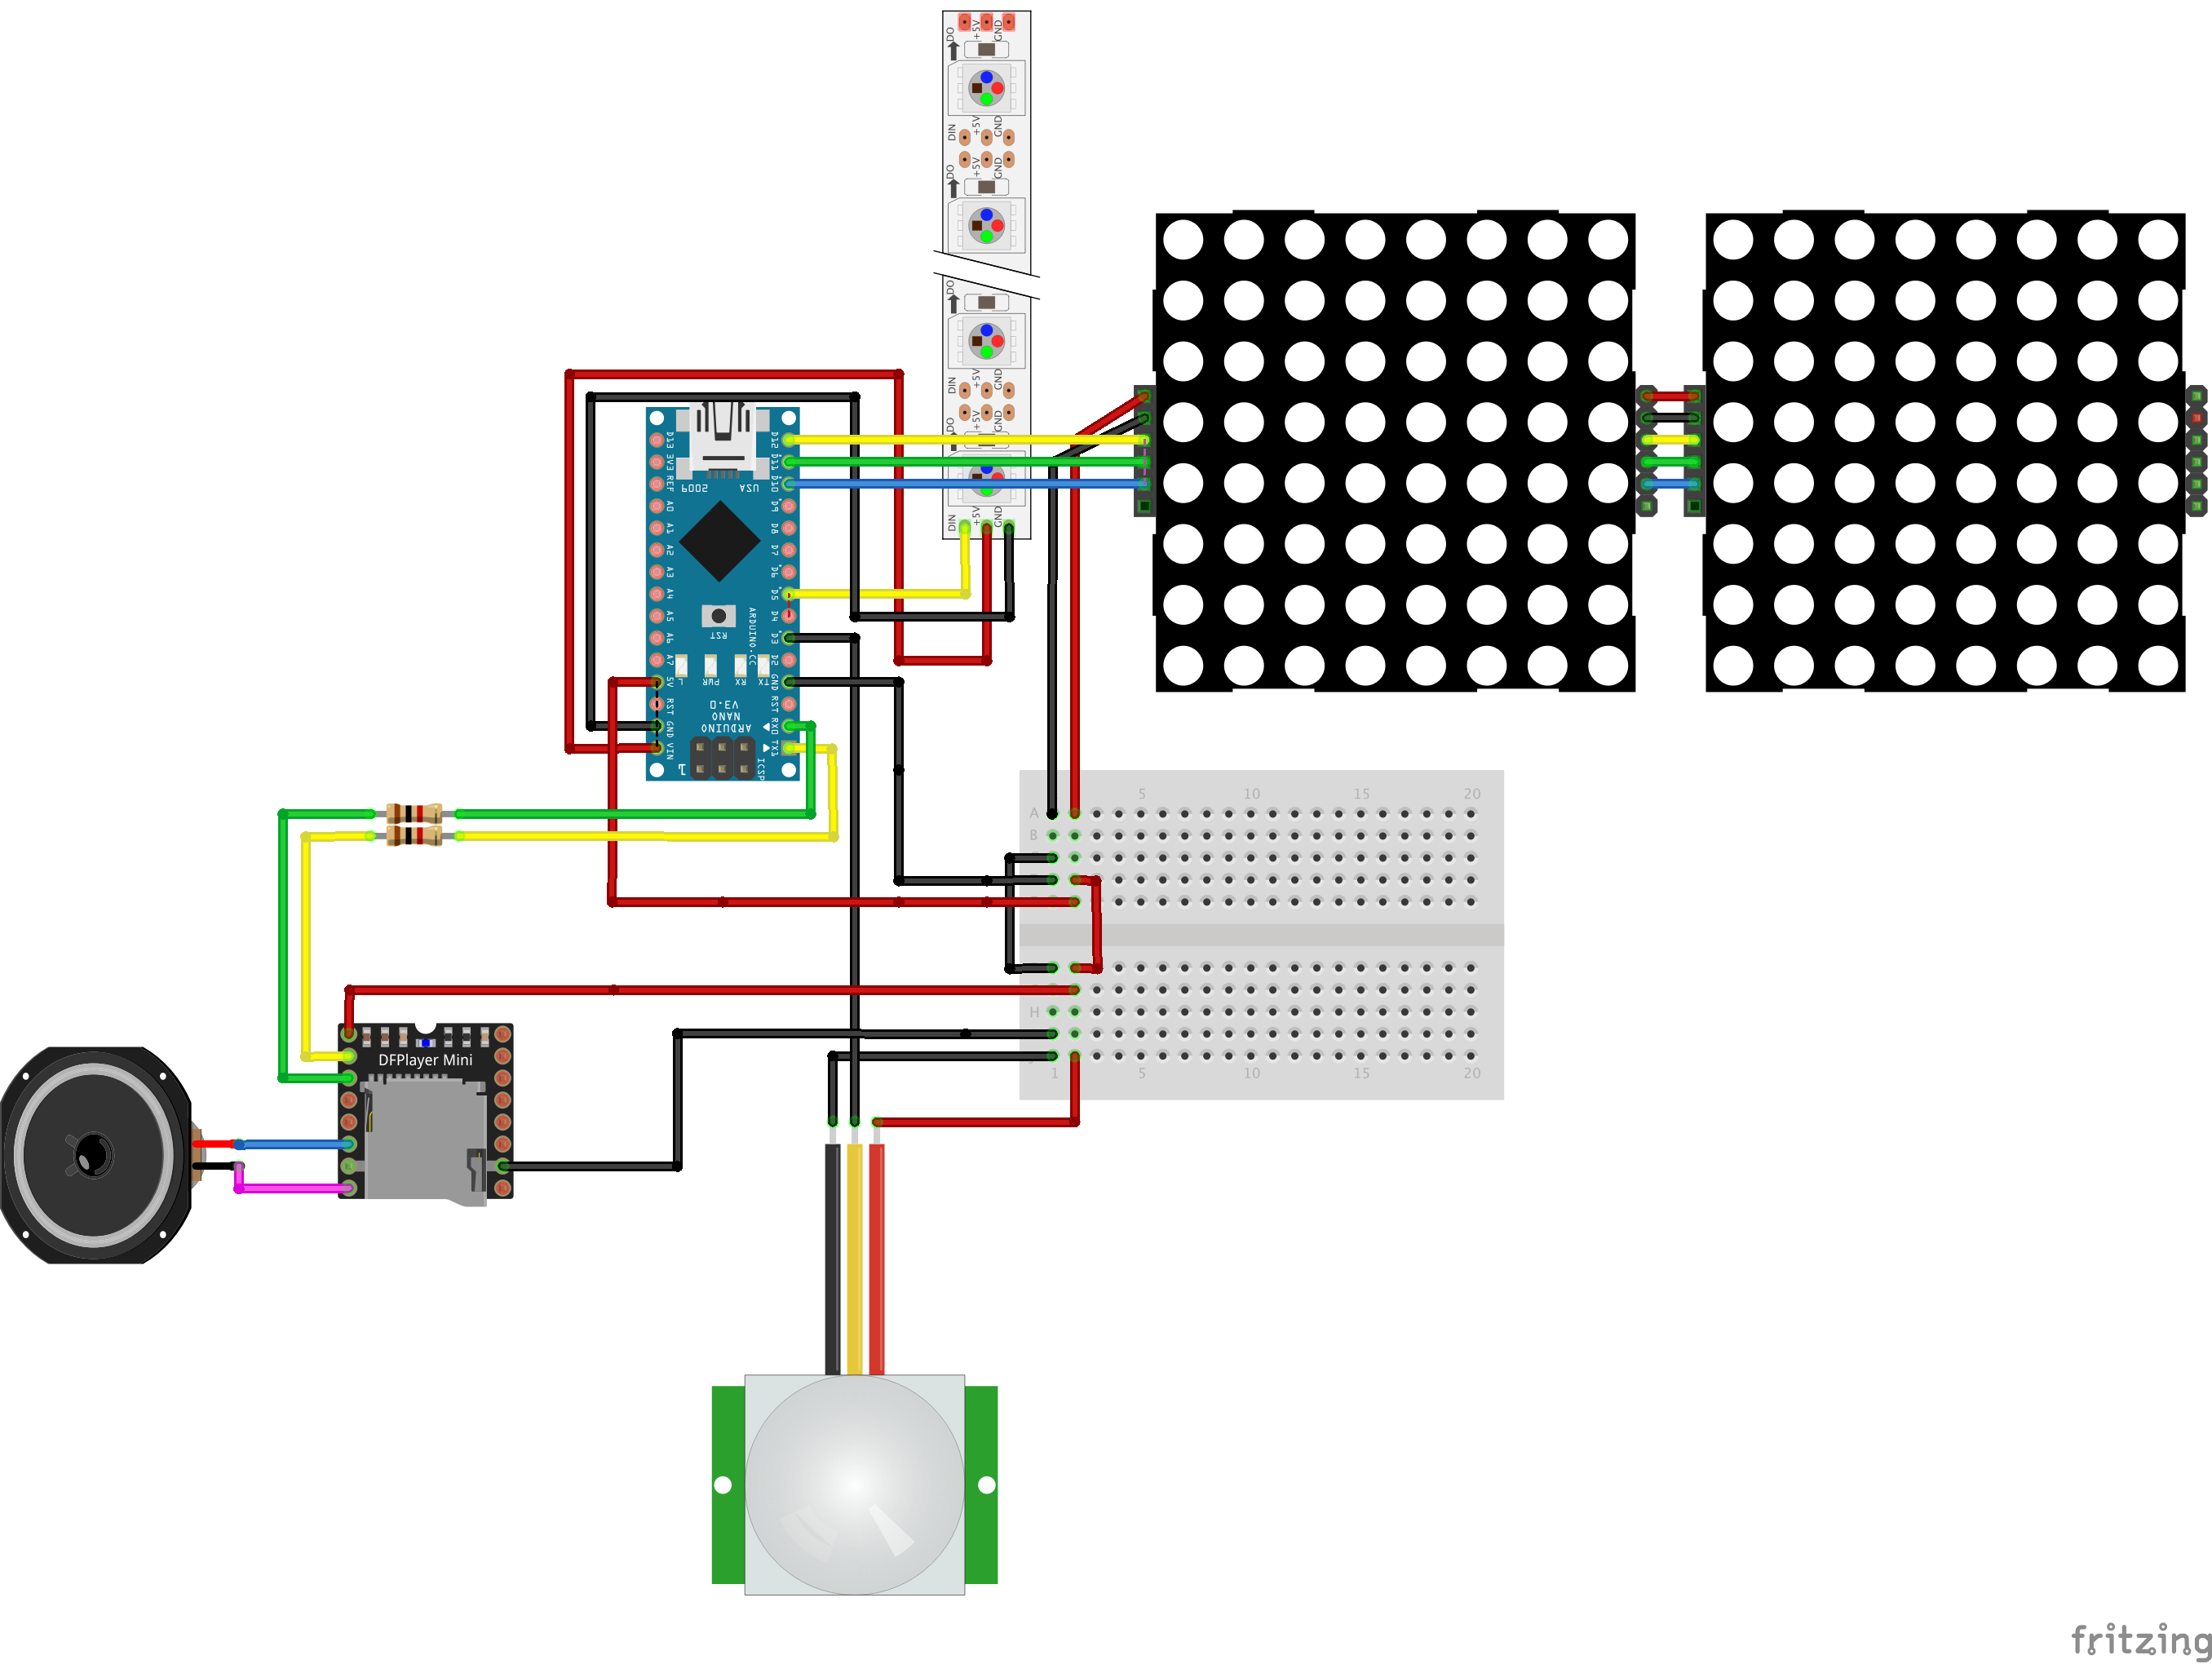
Initially i just hacked away, but as the number of half finished breadboards piled up, i quickly needed a way to remember how things were wired. Asking Google, the favorite tool is the excellent free Fritzing application, available on Linux, Windows and Mac. Here’s an example of an early scetch of my Halloween project

Also, i use the free Arduino studio for developing the scetches.
Revisiting an old friend
Sometime during the summer my old Surveillance solution gave up, as in the SD card died. Naturally i didn’t have a useable backup. I do have a backup, but given the location of the device, and a few years worth of tinkering, my backup was more or less worthless. I’d have to spend 4-8 hours updating and configuring, in which case i might as well just grab a current Raspbian image and work on that.
So being faced with a days worth of trial & error, and having recently discovered the Arduino platform, i decided to see how long it would take to create a “dumber” sensor.
The Hardware
I started out by adding an Arduino Nano, and a couple of DS18B20 sensors for measuring the outdoor temperatures.
I found a spare DHT11 for measuring the temperature inside the enclosure, along with relative humidity.
I also added a BMP180 for measuring barometric pressure (Why does every sensor also sense temperature ?)
The old client communicated via MQTT over WiFi, but coverage has been spotty (at best), which has only been saved by that fact that the MQTT client library caches data until a connection is once again available (or the RPi runs out of memory), so if i could avoid WiFi that would be a plus. Instead I opted for a HM-10 BLE Bluetooth module, which has a range of 60-100m in open terrain (my needs are 10-15 meters through walls)
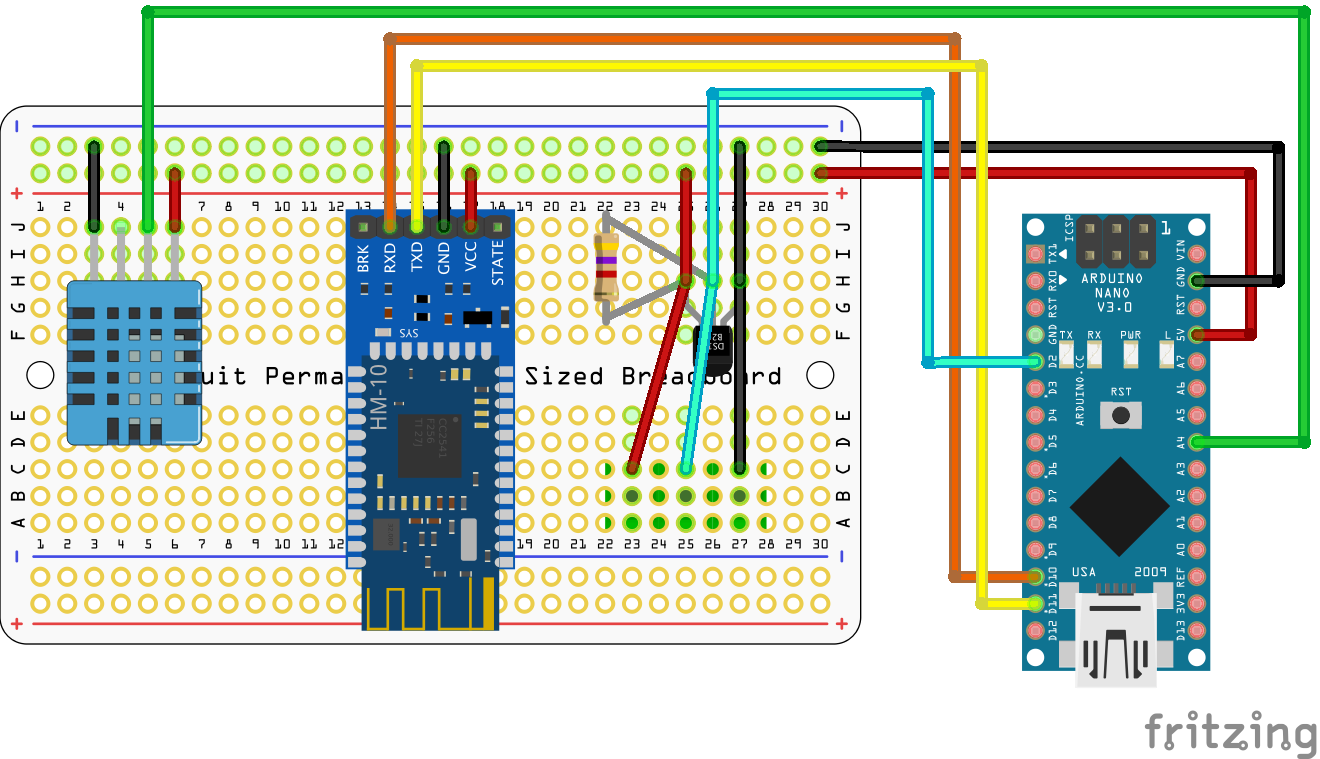
Time to wire it up

Using my recently aquired 3D Printer, i also made a nice case for it

The Software
The HM-10 module exposes a custom characteristic that emulates a serial connection. Clients can write values to this characteristic, and the software on the Arduino can then read this, and write a response. Bluetooth BLE only allows each characteristic to send 20 bytes, so it was time to get creative. Since i have multiple sensors connected, i needed some way of reading each of them, so i devised a “protocol” where i would write “read” followed by a sensor index, which would translate to the DS18B20 sensor with that index on the bus. The software would then update the characteristic, which in turn notifies the client that a new value is available.
Since i also have a DHT11 available, i decided to add a command for reading the temperature of that sensor.
On the Arduino i did something like this
void runCommand() {
  char tbuf[10];
  char addr[8];
  long dsidx = -1;
  char *end;

  if (memcmp(buf, "read", 4) == 0) {
    strcpy(tbuf, buf+4);
    dsidx = strtol(tbuf, &end, 10);
    bool ret = dsSensors.getAddress(addr, dsidx);
    Serial.print("tbuf:");
    Serial.println(tbuf);
    Serial.print("Idx:");
    Serial.print(dsidx);
    Serial.print(", ret=");
    Serial.println(ret);
    if (dsidx < 0 || dsidx >= dsCount || ret == false) {
      sprintf(buf, "E:-1");
      return;
    }
    dsSensors.requestTemperaturesByIndex(dsidx);
    currTemp = dsSensors.getTempCByIndex(dsidx);
    Serial.print("Raw :");
    Serial.println(currTemp);
#ifdef WITH_DHT
    char t2buf[10];
    ftoa(tbuf, currTemp, 6);
    currHumid = getHumidity();
    ftoa(t2buf, currHumid, 4);
    sprintf(buf, "T:%s,H:%s", tbuf, t2buf);
#else
    sprintf(buf, "T:%s", tbuf);
#endif
  }

#ifdef WITH_DHT
  else if (strcmp(buf, "dhtread") == 0) {
    currTemp = getDhtTemp();
    ftoa(tbuf, currTemp, 6);
    sprintf(buf, "T:%s", tbuf);
  }
#endif
}
On the server i’m using Python, and by using BLE it would be natural to write something asynchronous, but sadly the HM-10 module doesn’t really allow me to distinguish the sensor replies, leaving me clueless as to which sensor had replied when, so i had to force it to request a reading from a given sensor, and then wait for the response before requesting the next value.
I briefly considered putting the sensor ID in the response, but since i only have 20 bytes, and I’m also sending things like humidity, and a sensor address is 8 bytes, i figured it would be hard to fit additional (future revisions) data into it
Wrapping it up
The sensor above has now been running for a few months, and while the “60-100 meter” range on the BLE module might be a bit optimistic, it does function rather well.

I’ve built a couple of these sensors, and while one has been rock stable, the other “crashes” the bluetooth host of whatever server i connect it to. It appears to be running well for 2-24 hours, then suddenly stops responding. I’ve spent hours debugging it, but I’ve come to the conclusion that the problem is a buggy HM-10 module. Instead of replacing the module, i instead moved on to esp8266 modules, namely the Wemos D1 mini pro module, along with Micropython, but more on that later.